Giani Countertop Paint Kits | ||||||||||
| ||||||||||
Product Description
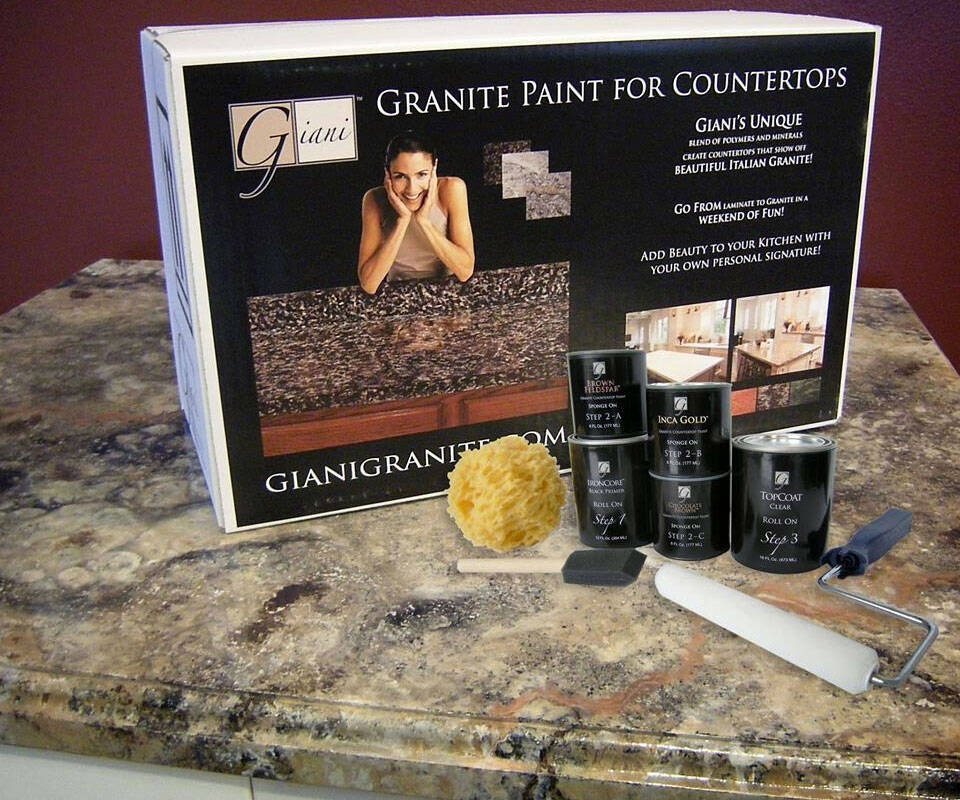
Giani Countertop Paint Kits are the perfect fit for budget conscious DIY kitchen makeovers. A simple 3-step process with all tools included, each kit will help you transform your existing countertops to the look of natural granite in just one weekend.
Kit Includes: 12 oz. IronCore Primer-Base Coat, 6 oz. Pearl Mica Mineral, 6 oz. Black Onyx Mineral, 4 oz. Bronze Mineral, 16 oz. Glitter Topcoat, 6†Giani Roller Arm and 2 Roller Pads, 4†Giani Paint Sponge, 2†Foam Brush, Practice Board
The typical project time is approximately 4 hours of painting and 16 hours of drying time. You may fully use your countertops as normal after allowing 14 days for your Giani application to cure.
**If you have a one-piece countertop and sink installation, and would like to paint both, please use XIM Tile Doc to prep the sink only. Tile Doc is a white epoxy-based aerosol spray paint designed specifically to update ceramic and porcelain sinks.**
Each kit covers up to 35 square feet of countertop surface area and provides easy cleanup with Giani Countertop Cleaner or gentle soap and water.
Giani Countertop Paint is durable and will hold up under the stress of normal, everyday use. Giani is formulated to cover typical countertop materials such as Formica, Corian, laminate, ceramic tile, cultured marble, butchers block and traditional granite.
Visit the manufacturer's website for live chat support and to receive help with project ideas, design advice, application assistance and more!
Manufactured in the USA.
Features
- countertop paint kit
- countertop makeover
Top Reviews
This Kit is Ace!by Peter North (5 out of 5 stars)
October 13, 2016
I bought the Sicilian Sand finish for 15 year old yellow, Formica counter tops. I almost wrapped the counter tops with a rubber adhesive cover, but I'm so glad I tried this first. The entire project took me about 3 days, or 15 hours spread out over 3 days, and I had 2 kids bugging me in between. Make sure to really clean your counter tops before putting this stuff on or else the paint will not stick. Use a razor blade to scrape anything you may have missed and you should be ready to paint.
Tip: Dab the entire counter space with one color before moving onto the next color, don't smear it or press too hard. Also, don't get discouraged if you dab too hard or something, because this paint is very forgiving. At one point, I was so pissed I had to stop the job for a half a day. I decided to continue and somehow pulled it off. The key is to "keep on layering," and the color will eventually turn out the way you intended.
Also, you're not going to see the actual beauty of your new tops UNTIL the top coat is put on. That's the key to making your new tops look, feel and shine like real granite. It's very important to remember this so as to not get unmotivated. I honestly feel as if my counters are new and I simply restored them versus just putting a band-aid on them. They're so clean and the surface is just awesome. Already got a ton of compliments. Also, did I make any mistakes? Yes. Has anyone else noticed? No. If anyone is looking that closely then I probably wouldn't invite them into my home anyway. The texture of this paint job tricks your eyes into not seeing any imperfections.
Buy it!
*UPDATE*
2.5 years later and it's still great. No issues at all.
Use clear epoxy over your Giani for an authentic granite look and feel
by Steve (5 out of 5 stars)
November 22, 2015
My countertop looks like granite. Instead of using the clear coat, I opted for clear Epoxy. The epoxy cost more, but it gives my counter top an authentic granite look. Even up close and touching people cannot tell it's paint, because of the epoxy. I read reviews where some people had issues with the paint peeling, so that's why I used epoxy.
Use epoxy resin glaze if you want 10X better results!
by Mr. Miyagi (5 out of 5 stars)
March 24, 2016
I've read many reviews from Home Depot, Lowes and Amazon and decided to do this for our laminate kitchen countertops. The result with the standard kit is OK. However, the result when using an epoxy resin glaze instead of the Giani Top Coat is AMAZING!
I'm not a big fan of the top coat glaze that comes with the kit. We tested it out on some of the back splash and it looked so-so. However, I saw a review on amazon where they substituted the included top coat with an epoxy/resin glaze.
LET ME BE CLEAR - it makes a 10X improvement! We have had people over our house and immediately think we got granite countertops. The glaze is very thick and makes the colors more vibrant and also adds a little bit of magnification that increases the granite effect. There are some cautions though about using the epoxy/resin:
It messy - be prepared to tape everything off as the resin will inevitably fall off the edges of your counters.
It only works on level surfaces - If your countertop has a "lip" on the edge, the epoxy will not cover it as it's self leveling. I had to use a sander and wood planer to shave off our countertop lip for the epoxy to settle correctly. Also, you will not get a nice coating on the side edges or back splash (it will develop runs). I recommend using Giani's top coat for any vertical surfaces and FAMOWOOD epoxy/resin glaze for the top.
You can royally screw up your countertops, so be prepared to take risks. However, I think this is totally worth it. Once you lay this down, it's extremely thick and cannot be sanded off easily. You really do need a chisel and sander to get back down to your original countertops. With a 15-20 minute cure time, you really need to make sure you work quickly and that you have full coverage. The instructions recommend a squeegee or trowel, but i found the best thing to do is use your two hands with nitrile or latex gloves. This allows you to feel the areas that have not gotten coverage.
One thing that I found is when the glaze is drying, sometimes it will pull away from some spots and you will have areas that are like little holes. Just make sure you don't skimp on using the glaze and you should be fine.
You'll also need another specialized tool such as a butane lighter or heat gun as you need this to remove bubbles after you have laid the glaze coat.
If you have the will and want amazing results, try the epoxy glaze, you won't regret it. I think my pictures are testament to this.
Affordable simple and FANTASTIC results:-)
by CactusJack (5 out of 5 stars)
January 26, 2017
A great alternative to the real thing!!!
Years ago we had decided to put up a backsplash and redo the counters, well, each new year kept coming and going but our old kitchen remained. Now mind you, the cabinets we love and they still look great - but the counters needed help. Well, this summer I put up a backsplash and it turned out pretty good, and although that helped, the countertops still needed to be addressed.
In steps the Giana Countertop kit:-)
This kit is simple, 99.2% all inclusive (provide your own sandpaper, scrub pad and paint tray) and looks pretty amazing once you complete all the steps. And the price point is VERY reasonable. I bought two kits to ensure I had enough to cover our countertops adequately.
The instructions are very simple to follow, but, if you desire, you can always visit the website and watch a step by step How To video:-) I did both and when we tackled our project the process was sooooo simple:-)
Be sure to clean your surface as instructed; Just water and a scrub pad, rinse it twice, tape everything off and begin the painting process:-)
We had finished our project, but before beginning the Top coat application, my wife changed her mind and wanted the surface to look more sandstone/tan; Not even a problem, we just used one of the included paints/colors and went back over the entire surface with it and I must say it really turned out fantastic. Just be prepared to put in some time. Overall process (including drying times took 20+ hours) You can see in the included photos how what was a black/white majority pattern turned into a TAN majority.
She loves it and thus far we're very happy with the finished product - now, as long as the longevity is there I think this kit could see many more applications in other projects we have planned:-)
Thanks Giani!!
Good product
by Sarah Mommy of 3 (5 out of 5 stars)
January 20, 2016
Update 2 years after install: seems the extra care taken when applying paid off. Making sure surface was cleaning it thoroughly and making sure the surface was sanded down so it was no longer slick. And that I allowed each layer to thoroughly dry.
I have had no peeling. The only damage I had had that I repaired was a guest deciding to cut something on the counter! And cut into the counter itself... So that wasn't a repair because the job failed but because someone literally sawed on it with a knife :( ... but it was easy to fix.
I have to say however... the gloss after 2 years is not as shiny? There is still sheen but I think the gloss just wore down a bit so I may be revealing the counter so the counter looks new and shiny again.
Over the years I cleaned with sponges, Clorox and degreasers... However the first few months you can see what I did below. I still do not take hard scrubby pads to the counter, if so.ething is stuck on I allow it to soak a bit and just wipe off.
Update 7 months after application: counter tops look just as new as they did when they were painted etc. no chipping or peeling anywhere.
Counters are heavily used via cutting boards, pots pans sitting on them.
Cleaned with clorox wipes and water and soap etc.
the first 3 months anything wet left on counters would make it look hazy until it dried. So I did get a heated dryer twice and reheated the counter tops and it seemed to stop this from happening as I think it helped in further curing of the epoxy finish.
Update: it's been about 2 months since application and still flawless.
Pretty good so far. I have seen some reviews where they stated the paint peeled off. From experience; although the directions say no sanding needed, if you are not going over roughed up laminate but really sleek surface it generally peels. I paint as a hobby.
I have laminate counters in the house I just moved into that I can't replace with granite right away. But can't stand how horrible the laminate looks.
I sanded my counter tops to make sure to remove whatever chemicals, grease and whatever else was gone with a fine grit paper.
I wash the counters really well.
I applied the iron ore primer and let it dry 20 hours.
The key is patience and not layering paint on top of already tacky paint if you want a good finish.
I them did the mineral dabbing. With every dab I rotated the sponge slightly so I didn't repeat patterns.
I also bought mica flakes and gold leaf dust, the gold was sprinkled using a toothbrush in it and rubbing the bristles over the bronze areas. I sprinkles a few mica randomly in the white areas.
I'm waiting for second clear coat to dry and cure 7 days and will then use a wet sandpaper to smooth the surface. Then use a rustoleum heat resistant epoxy for a glossy shine.
backsplash with Giani paint kit
by VLG (5 out of 5 stars)
March 18, 2017
I have Typhoon Bordeaux granite counters in my kitchen and wanted to use giani paint kit to create the matching backsplash. I first tried with silicon sand kit and the white spots did not match with my counter top at all. I purchased chocolate brown kit after seeking the suggestions through Q & A and redid the backsplash. I was very nervous while painting on the vertical drywall but it worked just fine. I have used toothpick to add some veins and it turned out well.
Many thanks to everyone for answering my question and guiding me. I can't thank enough Amazon for the great customer service!
This product is amazing!
by kkrd99 (5 out of 5 stars)
February 16, 2016
I purchased this product for a re-do in my kitchen and it turned out great! The process was simple and the product goes alot further than I thought. I have about 21 feet of counter in my kitchen, and still had enough product remaining that I gave it to my sister to try in her kitchen!
The sponging part takes the most time, but the primer and top coat do not take long at all. Due to drying times, I recommend to plan a few days to complete the re-do, start to finish. When complete, you must wait one day before using the counter top and 3 days to put any small electronics (IE coffee maker, toaster) back on the counter top.
The package contains the primer, colors, top coat, and 2 roller heads w/one roller. I used a small, disposable foil pan for the paint pan that was about the same width as the roller. I just lined the pan with tin foil and tossed that out after use (used a paper plate for the sponging colors rather than the pan)
If you decide to do this as a weekend project, I suggest priming on Friday night (is to dry 6 or 8 hours). I actually added two coats of primer and still had some left over. Sponging is 3 different colors (or 4 if you decide the color is too light and you need to add more black primer in the pattern, which I actually did) and then you need to wait for dry time and retouches if needed. Top coat is next, with 4 hours of dry time. I put on 3 coats of the top coat and allowed the first coat the full 4 hours.
One of the best things (besides the look) is the fact that there is NO odor!! This is something I was worried about because I decided to do this on a January weekend in Iowa so would have frozen had I opened the windows! My throat swells up and I cough a lot if using paint/stain/varnish products - one thing I was not looking forward to - however, that did not happen with Giani. In fact, the weekend after this project, I painted one wall in the kitchen and I started coughing, throat became scratchy - obviously not enough to deter me from a project, but definitely noticeable.
If needed, I will definitely buy this again! I may even re-do my counters in the black, as I really liked the look of the black primer :)
Pictures are attached of our before, during and after; and then also a close up of the pattern we did.
This stuff REALLY works!!!
by armywifey4lifey (5 out of 5 stars)
August 29, 2010
I had gray laminate countertops in my kitchen. There's nothing wrong with them and they're fairly new, so we couldn't justify the cost of tearing them out and replacing them with granite. I found this product online and was skeptical but figured I had nothing to lose. Before my kit arrived, I was so anxious to get started that I watched the how-to video and practiced a few times on black poster board with leftover paint I had lying around the house. I wanted to figure out what worked before I started on my counters. Here's what I learned through trial and error:
-I used a foam roller pad to roll on the primer. A fuzzy pad tends to leave roller marks.
-Instead of the included round sea sponge, I bought a cylindrical sea sponge, poked a hole through the middle, attached it to a mini roller frame, and used it to roll on the mineral paints. I found this gave me more even coverage and a more random pattern, and avoided those round sponge impressions.
-Instead of dipping my sea sponge into the paint, I brushed it onto the sponge sparingly with a paintbrush. Too much paint on the sponge will make it look very fake and is hard to correct once it's on your counter. But it's easy to add more if you need to.
-I took my project a step further and added gold leaf flakes and brown glitter, as real granite often has a sparkle to it. After I had finished painting, I sprinkled the gold flakes sparingly and randomly over the counter while the paint was still wet, then mixed some ultra-fine glitter into the top coat, and rolled it on as directed after the paint had dried. I think it made my countertop look even more like authentic granite.
I think the end result looks amazing, and even up close, it's hard to tell the counters were painted. You definitely need to take your time though, and also be careful not to overwork the mineral paints, or you'll end up with a smeary mess. Practicing a few times first definitely helped me.
I loved this product for six months or so- it wasn't ...
by Imyours (2 out of 5 stars)
December 18, 2016
I loved this product for six months or so- it wasn't to hard to put on and really looked good- then it started coming off by my stove :( - it has a sticky feel to it all in that area. I think the heat is effecting it. I put multiple clear coats on. I think I will have to sand off the area an re do it. It has been one year since application and it gets worse all the time in this spot
Terrible Durability
by Mitchell Kantar (1 out of 5 stars)
September 19, 2017
I should have known it was too good to be true, but I tried it anyway to make my ugly laminate counter more attractive until I could afford to replace it. I followed all of the directions to the letter. It was difficult to apply in a way that makes it look "granite-like," and some sections came out with more of a cheetah look. However, I would have been ok with this if it weren't for the terrible durability. In less than four months, there were already sections that were starting to peel off. In under a year, all of the corners were showing the white laminate underneath, and the edges were starting to show through as well. After a year and a half, it just looks awful. I think I would have preferred the original ugly white laminate for all this time instead. Also, we do not use any abrasives or cleaners on it besides soap.
Customers Who Bought This Item Also Bought
*If this is not the "Giani Countertop Paint Kits" product you were looking for, you can check the other results by clicking this link

